This week’s Articulate e-Learning challenge was all about e-Learning storyboard templates before design. It was a great week as I learnt what it means to storyboard a plot before launching the actual authoring tool to design the course.
Story-boarding?
This is the first stage of every design where the instructional designer thinks through the course to be designed and writes a plot of how it’s gonna look like. Storyboarding ranges from hand sketches, to word documents that include information about the course like navigation, images, animations etc.
Story-boarding tools
Several tools are available for storyboarding a course before designing. From as simple as a word document is, to powerpoint. Some even use the authoring tool directly. For me, being very new to story-boarding, I went with the simplest of them…A word document in a table format. (And e-Learning story-boarding 101 was my major guide)
Content
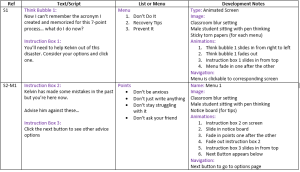
My table contained headings like Ref, Script/Text, Menu/List and Development Notes. I showed the screen script, different menus and how they should be displayed. I wrote down the different animations and navigation into and out of the screen.

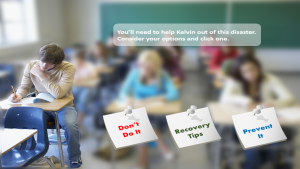
I therefore decided not just to learn by watching but actually use story-boarding to create a digital version of my Low-tech non digital disaster recovery project. So I used the storyboard as a guide to designing. It was fun yet engaging and full of learning.

My take away
1. Storyboards reduces time spent on actual design. You spend the time thinking through during the storyboarding stage and so the real design is much faster.
2. I discovered that (Maybe because it’s my first) I had to adjust a few details on the storyboard due to some reasons. One major was changing the image to be used. After deciding what I plan to use only to find difficulty to getting a good image… Another was changing the direction of the animation.
3. Storyboarding like several people have said, forces you to have a reason for every text, shape, audio and navigation.
Story-boarding Tips for e-Learning designers
1. Whether your client requires it or not, it’s best to storyboard your course before designing. It takes your major time but makes the actual design very simple and consistent.
2. Don’t worry about every minute detail yet…just give yourself or client as much information as needed to ‘see’ the course through from scene to scene over to the end.
Feel free to download both the story-board prepared in MS word and the output course design built in PowerPoint.
Enjoy!


I was able to find good information from your content.
Thanks Backlinks for stopping by, I’m glad it did help.